- Homemade lash serum
- Best eyelash extensions
- Monat lash serum
- Big eyelashes
- Lash lift after care
- Lash lift damage
- Lash conditioner
- Eyelash lift and tint
- How long do fake eyelashes last
- The lash loft
- Best drugstore lash serum
- Lash grower
- Lash places near me
- Removing individual lashes
- Eyelash thickener
- Ardell individual lashes
- Grande lash
- Wet look lashes
- Mascara base
- New lounge lashes
- Loreal mascara primer
- Keratin lash lift
- How to make lash extensions last longer
- Eyelash curler
- Hybrid full set lashes
- Best drugstore eyelash curler
- Beaudee lash bar
- Grande lash walmart
- Classic hybrid volume lashes
- Lash sensational serum
- Individual lashes
- Keratin lash
- Eyelash curler for small eyes
- Lash lift and tint near me
- Best lash growth serum
- Eyelash salon
- How long do eyelash extensions last
- Individual lashes near me
- Best lashes for asian eyes
- Eyelash curling treatment
- How to make lashes last longer
- How to make false lashes last longer
- Makethemake peptide volume builder mascara primer 19 € 10 ml
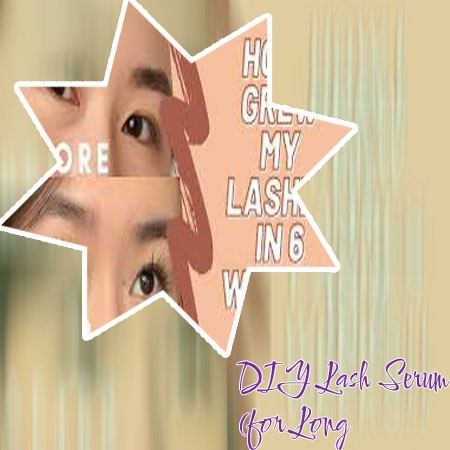
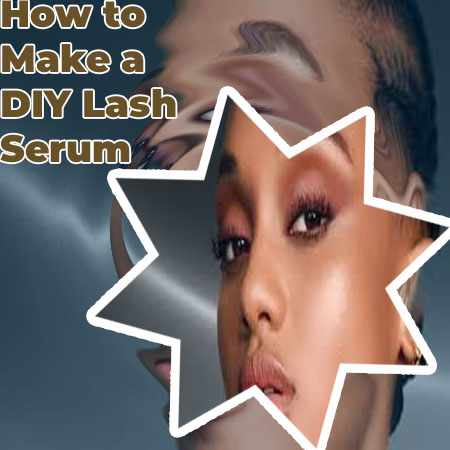
Homemade lash serum DIY recipe for longer-looking eyelashes
Why people choose homemade lash serum
Homemade lash serum can be a simple way to support the look and feel of your lashes using familiar, budget-friendly ingredients. Many users like the hands-on control: you decide what goes in, adjust the texture to your preference, and apply it as part of a calming nightly routine.
Because lashes are small and delicate, consistent conditioning can make a noticeable difference in how flexible they feel, how neatly they sit, and how “full” they appear when they’re healthy and well-moisturized.
Key benefits users often notice
1) Better conditioning and softness
Lashes can become dry and brittle from mascara, makeup remover, lash curlers, extensions, and environmental stress. A gentle oil-based serum helps reduce that dry, “crunchy” feeling and supports a softer lash texture.
- Helps lashes feel more flexible, which may reduce snapping during makeup removal.
- Creates a smoother surface so lashes can look more uniform.
- Can make lashes feel less stiff after frequent mascara use.
2) Less visible breakage over time
Homemade serums don’t “glue” lashes together, but they can help reduce friction. When lashes are conditioned, they may tolerate brushing, cleansing, and light rubbing better.
- Useful for people who notice short, uneven pieces along the lash line.
- Can support the look of length simply by helping existing lashes stay intact.
- Pairs well with gentler cleansing habits and less tugging.
3) A fuller-looking lash line (appearance benefit)
When lashes are hydrated and separated, they often look darker, shinier, and more defined—even without mascara. That can translate to a fuller overall look without necessarily changing the number of lashes you have.
- Shine and definition can make lash tips more noticeable.
- Better flexibility helps lashes sit in a more lifted, tidy shape.
- Conditioning can reduce the “spiky” look caused by dryness.
4) Budget-friendly care
Many homemade lash serum recipes use small amounts of common items. For users who enjoy DIY, the cost per batch can be low, especially when you already have the ingredients.
- Small batches help reduce waste.
- Easy to tweak ingredients if one doesn’t suit you.
- Helpful for people who like minimal, fragrance-free routines.

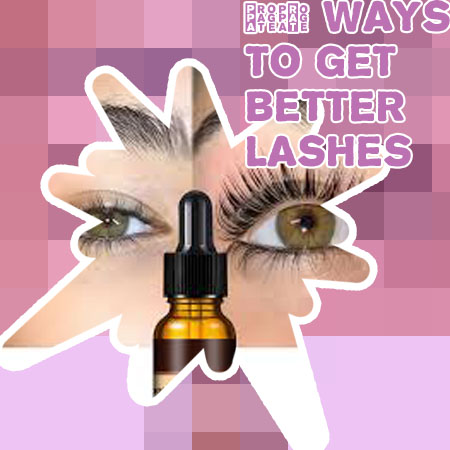
Ingredients people use (and what they’re good for)
Most homemade lash serums rely on conditioning oils and optional add-ins. The goal is usually to moisturize, reduce friction, and support the look of healthier lashes—not to “force” growth overnight.
Carrier oils (the base)
- Castor oil: Thick, coating, and popular for a protective feel; best used sparingly or mixed so it’s not too heavy.
- Jojoba oil: Lightweight and less greasy; good for users who want a thinner serum.
- Sweet almond oil: Softening and smooth; avoid if you have nut allergies.
- Grapeseed oil: Very light; can feel less “sticky” on the lash line.
Soothing and conditioning add-ins (optional)
- Vitamin E (tocopherol): Often used in tiny amounts; can add a richer feel and help slow oxidation in oil blends.
- Aloe vera gel (very small amount): Can add slip; only use products meant for the eye area and avoid getting it into the eye.
Ingredients to avoid near the eyes
- Essential oils: Frequently irritating and risky around eyes.
- Lemon juice, vinegar, spicy extracts: Too harsh and can sting badly.
- Unpreserved water-based mixes: Higher contamination risk if stored and reused.
Simple DIY recipes users like
Recipe A: Basic 2-oil blend (beginner-friendly)
- 1 part castor oil
- 1 part jojoba (or grapeseed) oil
This balances castor oil’s thickness with a lighter oil so it spreads more evenly and feels less heavy on the lash line.
Recipe B: Lightweight conditioning blend
- 2 parts jojoba (or grapeseed) oil
- 1 part sweet almond oil (skip if allergic)
- Optional: 1 drop vitamin E per 10–15 ml bottle (not more)
Users who dislike a greasy feel often prefer this style because it’s thinner and absorbs faster.
Recipe C: “One-ingredient” approach
- 100% jojoba oil or 100% castor oil (use very little if thick)
Keeping it simple can help you identify what works for your skin and reduces the chance of irritation from extra ingredients.

How to apply homemade lash serum for the best experience
Tools that work well
- Clean spoolie: Good for brushing through lashes with a tiny amount of product.
- Eyeliner-style brush: Helps place product closer to the lash line without overloading.
- Cotton swab: Simple, disposable option; use a very light touch.
Step-by-step application (night routine)
- Remove makeup thoroughly: Any leftover mascara can trap oil and make lashes clump.
- Cleanse and dry: Apply only when the area is dry to reduce product migration into the eye.
- Use a tiny amount: Dip once, then wipe excess on the bottle rim—less is better.
- Apply at the lash line: Lightly coat the upper lash line and brush through lashes.
- Avoid waterline placement: Keeping product out of the eye reduces stinging and blurred vision.
- Let it settle: Wait a few minutes before lying down to limit transfer.
How often to apply
- Most users: 3–7 nights per week, depending on sensitivity.
- If your eyes are easily irritated: Start 2–3 nights per week and increase only if comfortable.
- If you wear mascara daily: Prioritize gentle removal; conditioning works best when lashes aren’t being tugged.
What “results” can realistically mean
Appearance improvements you can notice sooner
- Less dryness and a softer lash feel within 1–2 weeks.
- More defined, glossy lashes that look healthier without makeup.
- Reduced breakage from brushing/removal when paired with gentler habits.
Changes that take longer
Lashes have natural growth cycles. If your routine reduces breakage and keeps lashes conditioned, you may gradually retain more length, making lashes look longer over time. Many users track changes over 6–10 weeks rather than days.
Safety tips (especially important around the eyes)
Patch testing and irritation checks
- Patch test on the inner arm or behind the ear for 24–48 hours before first use.
- If you feel burning, itching, or significant redness on the eyelids, stop using it.
- If product gets into the eye and stings, rinse with clean water and discontinue if discomfort persists.
Hygiene rules that protect your eyes
- Use a clean container; sterilize with soap and hot water, then dry fully.
- Avoid dipping used mascara wands into your serum bottle (bacteria risk).
- Replace applicators often; don’t share lash products.
- Make small batches and discard if smell/texture changes.
Who should be extra cautious
- Contact lens wearers (oil can fog lenses if it migrates).
- People prone to styes, blepharitis, or clogged glands.
- Anyone with known allergies to nuts or specific oils.
How to tailor a homemade lash serum to your needs
If your eyelids are oily or you get clogged pores easily
- Choose lighter bases like jojoba or grapeseed.
- Apply less product and keep it mainly on the lashes, not the skin.
- Use it fewer nights per week to see how your lash line reacts.
If your lashes feel dry, stiff, or fragile
- Add a small portion of castor oil for extra coating.
- Focus on gentle makeup removal and avoid aggressive rubbing.
- Brush lashes carefully with a clean spoolie—no yanking at tangles.
If you want the simplest routine possible
- Stick to a single oil you tolerate well.
- Use a dedicated, clean brush and store the serum away from heat and light.
- Apply consistently rather than layering heavy product occasionally.
Habits that amplify the benefits
Gentle removal and cleansing
- Soften mascara first (press remover on lashes briefly instead of scrubbing).
- Cleanse the lash line to remove residue that can cause irritation.
- Avoid waterproof mascara daily if you notice breakage from removal.
Makeup and tool choices
- Replace mascara regularly to reduce bacterial exposure.
- Clean lash curlers and avoid crimping lashes repeatedly.
- If you use false lashes, remove glue gently and give lashes rest days.
Supportive lifestyle factors
- Prioritize sleep and manage stress (overall hair health can reflect routine and recovery).
- Eat a balanced diet with enough protein, iron, and healthy fats.
- Stay hydrated; dryness can show up in skin and hair texture.
A helpful resource for comparing options
If you enjoy DIY but also want to understand what’s commonly used in lash-enhancing routines, you can explore this homemade lash serum resource to compare approaches and pick ideas that match your comfort level and sensitivity.
Common questions users have
Will homemade lash serum make lashes grow faster?
Most homemade serums are best understood as conditioners. They can help lashes look better by improving softness and reducing breakage, which may make it easier to retain length over time.
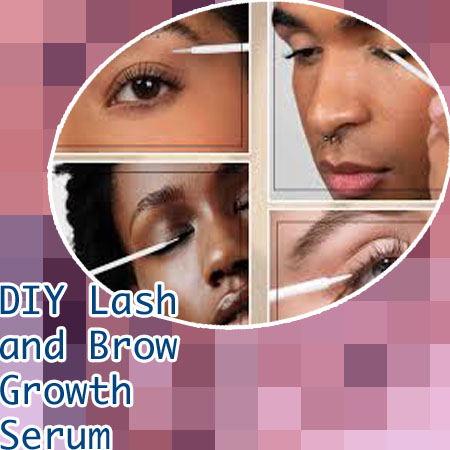
Can I use it on brows too?
Many users apply the same oil blends to brows. Use a clean spoolie, apply lightly to avoid greasiness, and stop if you notice clogged pores or irritation.
How do I prevent the serum from getting in my eyes?
- Apply the smallest amount possible.
- Keep it off the waterline.
- Wait a few minutes before lying down.
- If your eyes water easily, apply earlier in the evening.
How long should I keep a DIY batch?
Because homemade mixes aren’t always preserved like commercial products, many users prefer small batches and replace them regularly. When in doubt—especially if the smell changes—discard and remake.
Support Chat: “Toplash Be Expected” — Using a Homemade Lash Serum as the Example
Agent: Welcome to support. People often ask what “Toplash be expected” really means in daily use, so let’s talk about it in the most practical way: a homemade lash serum routine.
What results should be expected (and what should not)
User: If I start a homemade serum today, what should I expect?
Agent: Expect small changes first: lashes feel softer, look less dry, and break less when you remove mascara. Real length and fullness usually look better after steady use for a few weeks. Don’t expect overnight “false lash” volume. If you stop, the look usually slowly goes back to your normal baseline.

Homemade lash serum: what people actually use
User: What counts as “homemade lash serum” here?
Agent: Most people keep it simple: a clean spoolie and a lightweight oil (like castor oil mixed with a lighter oil so it’s not too thick), or aloe-based mixes. “Toplash be expected” in this example means: clean application, consistency, and realistic timing—more like skincare than a quick hack.
Safety rules (the support team repeats these every day)
User: What’s the biggest mistake?
Agent: Using random ingredients too close to the eye, using dirty brushes, or storing a mix too long. Keep batches small, patch test, and stop if you get itching, redness, watery eyes, or blurry vision.
- Apply a tiny amount at the lash line, not inside the eye.
- Use a clean spoolie or clean liner brush every time.
- Remove makeup gently; rubbing cancels out progress.
“Expected” schedule for visible changes
User: Give me a simple timeline.
Agent: Week 1–2: less dryness, fewer snapped lashes. Week 3–6: lashes may look a bit longer because they’re not breaking as much and they sit nicer. After that, results depend on your lash cycle and how steady your routine is.
My rules for using homemade lash serum (from a Casino Game Developer who likes clean routines)
1) I treat it like an eye product, not a kitchen experiment
I only use a freshly sanitized container (boiled and fully dried, or wiped with 70% isopropyl alcohol and air-dried). If it ever smells “off,” looks cloudy, or separates in a weird way, I toss it—no negotiating when it’s going near my eyes.

2) I patch-test first, every time I change anything
I test a tiny amount on my inner forearm or behind my ear and wait 24 hours. If I get itching, bumps, redness, or a hot feeling, that recipe doesn’t get a second chance.
3) I keep the ingredient list boring on purpose
I avoid fragrance, essential oils, lemony stuff, and “spicy” botanicals. The skin along the lash line is dramatic and doesn’t need extra plot twists.

4) I apply it like eyeliner—thin, precise, and only where it belongs
At night, on a clean, dry face, I use a clean spoolie or a fine brush. I swipe a very thin line along the upper lash line (where the lashes start), then lightly comb through the lashes. I don’t coat the waterline, and I’m careful not to flood the roots—more isn’t better, it’s just messier.
5) I keep it out of my eyes, full stop
If it gets into my eye, I rinse with lukewarm water for a couple of minutes. If irritation sticks around, I stop using it. I’m patient with growth, not with burning.

6) I stick to a simple schedule
I use it once a day at night for a few weeks, then reassess. If my lash line looks calm and happy, I might continue nightly; if it looks dry or feels itchy, I switch to every other night. I don’t treat lashes like a daily challenge to “optimize.”
7) I set a strict shelf life
If there’s any water-based ingredient, I keep it refrigerated and replace it fast (think days, not months). If it’s oil-only, I still replace it regularly and never “top it off” in the same tube. I label the date because I forget everything unless it’s written down.
8) I watch for the quiet warning signs
I stop immediately if I notice redness at the lash line, swelling, flaking, stinging, watery eyes, or new little bumps. I also pause if my eyes feel gritty in the morning—my lashes are not worth a week of irritation.
9) I don’t mix it with risky habits
I don’t share applicators, I don’t double-dip a used wand, and I don’t apply right before contacts. If I wear contacts, I apply after they’re out for the night and I wash my hands like I’m about to handle a microchip.
10) I measure progress the unglamorous way
I take a photo every week in the same lighting, same angle, no mascara. I’m looking for healthier-looking lashes and less breakage, not instant “movie lashes.” If I want dramatic results, I’d rather talk to a professional than gamble with my eyeballs.
Lauren Mitchell, 34 y.o. — Chicago
I ordered the Homemade Lash Serum from toplash.com on a whim after ruining my lashes with extensions, and I’m honestly kind of obsessed. The brush is easy to use and it doesn’t sting my eyes, which was my biggest fear. After about three weeks I noticed my lashes looked darker and a little longer, and by week six my mascara started going on differently because I actually had something to work with.
The best part is they feel stronger—less fallout when I cleanse at night. I keep it on my bathroom counter and swipe it on like clockwork. Not dramatic miracle vibes, just a steady “wait… wow” improvement that made me weirdly proud of my own lashes again.